11/25/2005

Too Much Talking & Not Enough Pictures

My projects are just all over the road right now. Basically, to keep myself busy (as I have found myself both without a car and without a computer over the last few weeks - though I have both back now), I have been painting and painting and painting. Let me walk you through a few things I've been working on.

The defining characteristic of my latest thrust in painting enthusiasm has been extreme randomness. I paint a bit of something, while it's drying I move on to something else. No plan for the role it will play in my army. No plans to turn anything into a squad instead of a single model. No nothing. Just painting. Paint, paint, paint. Here's an example... a Defender Guardian I put together:
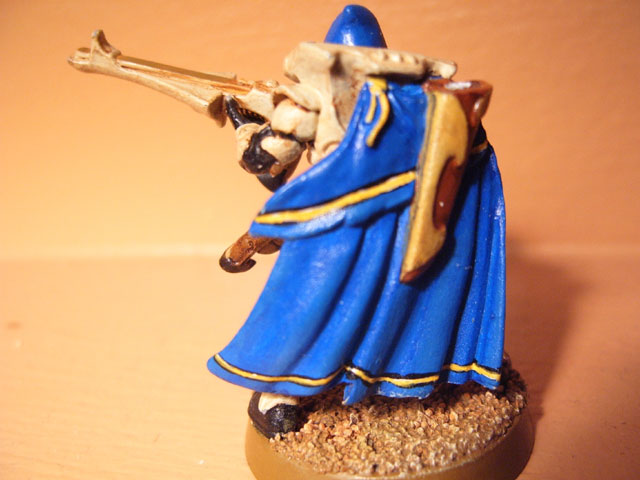
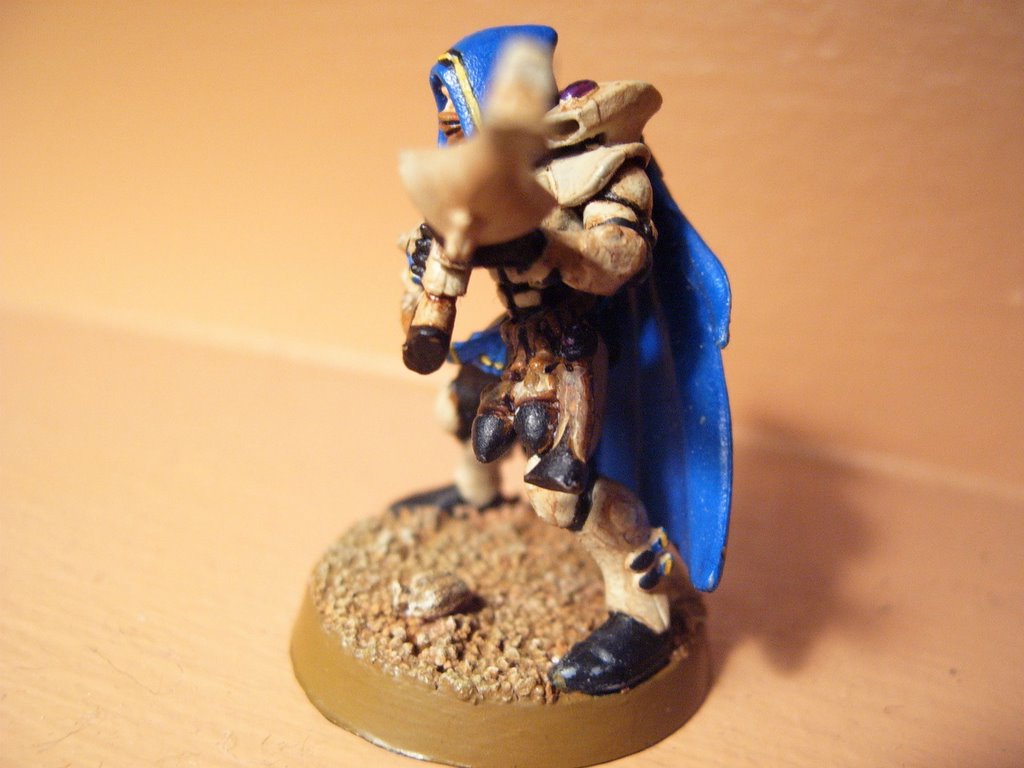
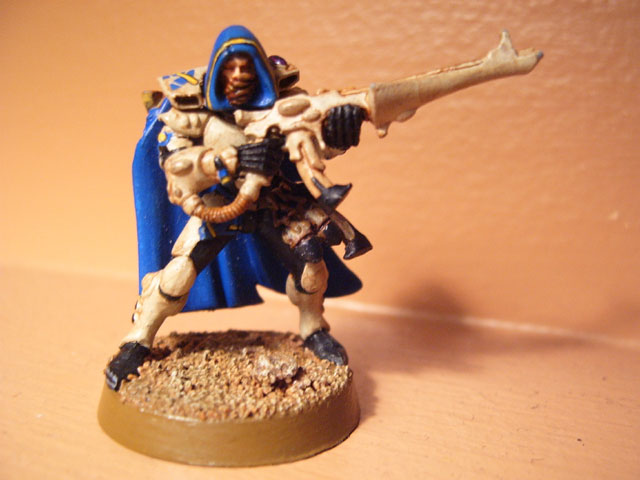
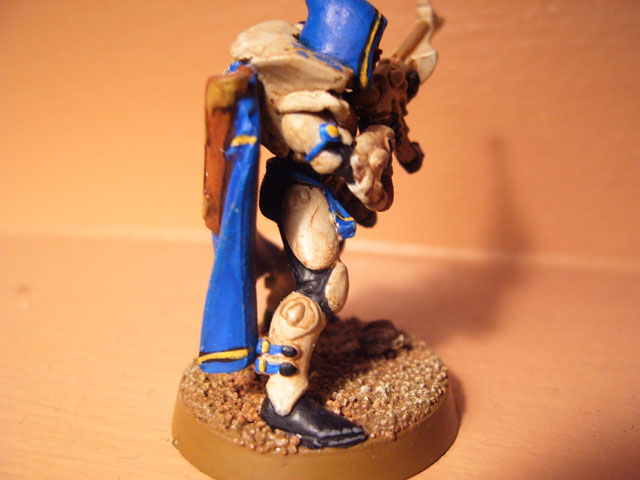
He's part Defender Guardian, part Wood Elf (as I'm sure most people familiar with the current GW model line will spot instantly). I like him. I like him a lot. The photo doesn't do him a lot of justice, to be honest; there's shading and highlighting in there which easily qualifies as some of the best - if not the best - I've ever done. The down side is that I took an entire night to paint this guy. Do you really think I'm going to do one per night for the next umpteen nights until I have a nice base of 24 or more Defender Guardians? Don't count on it. I already get hives just from looking at the amount of work that went into this one guy... let along the aneurism I'd give myself considering doing an entire squad.

The yellow lines are done first by laying down a black stripe. Then, I use white (Reaper Mini white) to draw a second line inside the black one. Then, I follow up with GW Golden Yellow (maybe mixed with a bit of yellow ink) and paint over the white line. It looks snappy, but now you understand why I'm not so sure I'd want to do a whole army this way (and yet I wouldn't be happy with anything less). The rest of the model either uses the Wraithbone technique I've described elsewhere in this blog, or simple techniques that everyone knows how to do. I got the inspiration for the conversion from... well... EVERY Eldar player came up with this idea when the Wood Elves came out, so there's nothing really special about me in that regard. I did check out the Canadian supplement in White Dwarf magazine for some ideas on how to make this happen (though I definitely took it in my own direction).

I've always liked the Defender Guardian model, and I'm also really into the Wood Elf stuff... so I'm pleased with what I have here. And it'll be just fine as it is.

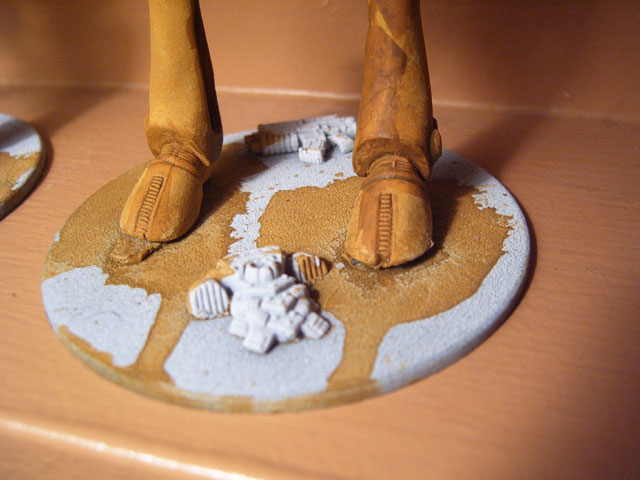
One thing: The bases I'm doing are more desert now. I've been thinking of doing a table in desert style, and I have a lot of trouble getting the colors right. Everyone tells me how to do it, but the truth is I've had trouble finding a recipe that I like. At present I'm using Snakebite Leather, then Bubonic Brown, drybrushed with bleached bone and then a little white on top. The Bubonic Brown gives it the yellow it needs, the Snakebite gives it some "earth", and the Bone & White add a bit of "dust" that looks good (in my opinion).

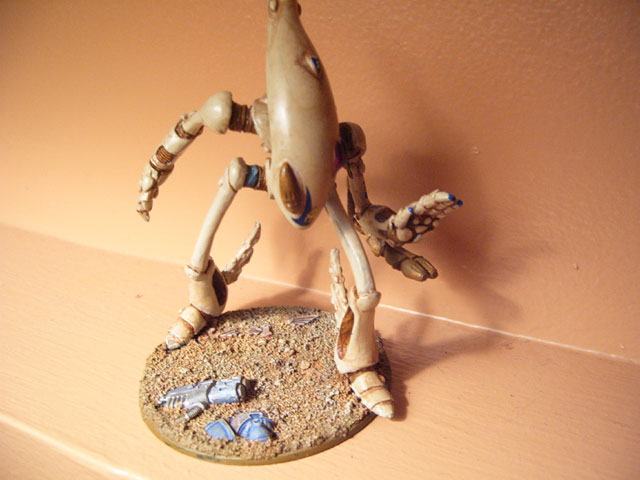
You can see more of that on the base I used for this big fella:
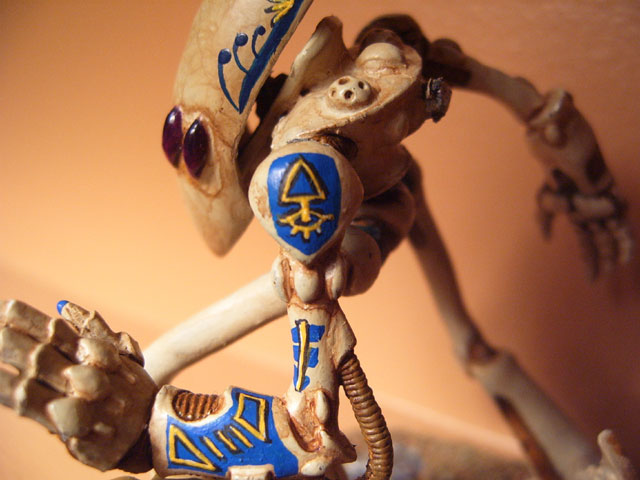


As far as the base goes, I have added some Space Marine debris to give the base some personality. It's not quite as vindictive as it seems; I just had some spare Marine bitz to make into scenery and it's generic enough to use Imperial trash and wreckage that it doesn't pigeonhole the character of the model too much. For the Marine debris, I used a method shown to me by Ottawa-area painter/modeler Dennis Campbell. I won't bother describing it here just now... but it makes the stuff look nice and worn and old. I use that technique very often.

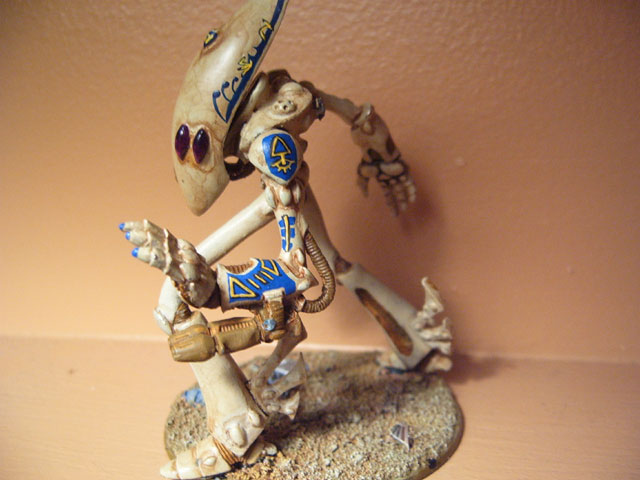
Now, where the Wraithlord himself is concerned... this guy has driven me nearly to my grave. Why? Because countless times during its gestation process I have wanted to shoot myself in the temple from frustration. I've described elsewhere the kind of things I did with Green Stuff and hacking him into bits, but this guy just does NOT want to stay in one piece. He's been as fragile as glass. I've had to pin him multiple times and have torn him down to ground zero and started from scratch at least five times. I haven't finished painting him yet, but notice that I have put some yellow and blue runes up his left side. I just liked the look of it. You'll also see some on his faceplate.

As he nears completion, I can see that he is a really nice model in a cool pose. He isn't the success story I hoped he would be, but that's ok. I did learn some good lessons about modeling and painting. I'm hoping the next one will be a decent step foward.
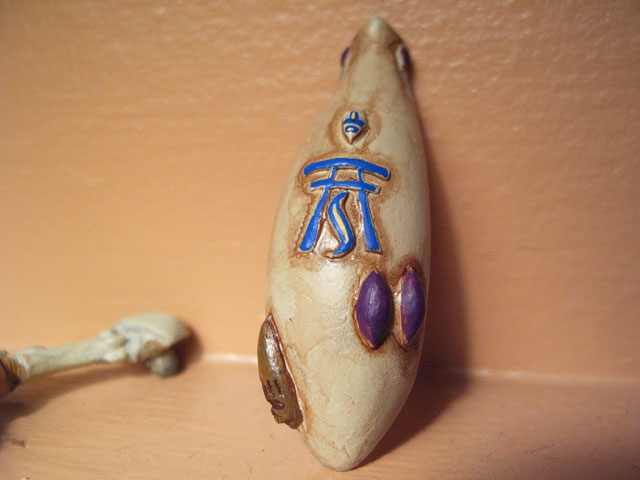

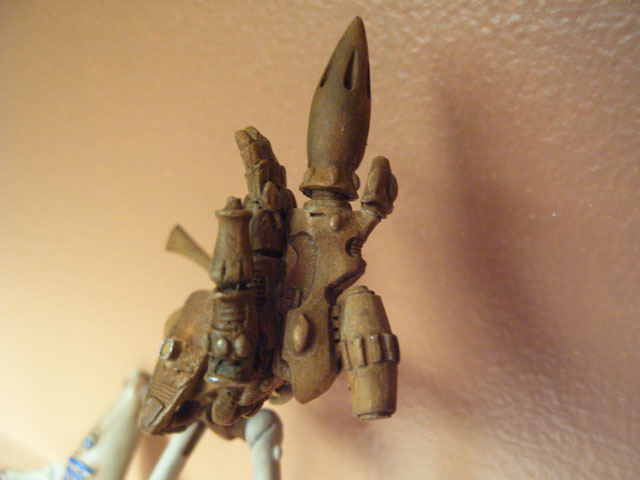
He's obviously not quite done. In an effort to discuss what he's all about, let me play a little game of "Good, Bad, Interesting".

The Good:
I used Green Stuff on his face plate to create the Shrine of Asur icon that is characteristic of Iyanden (once I started a second Wraithlord I thought it'd be wise to leave the door open to Iyaden in case some day I won the lottery and became a shut-in and finished an Iyanden army). Now THAT worked out nicely. Despite the photos (which make everything look way worse than it really is), that raised emblem on his face is really nice.

One of the best things about this guy is that he is rock solid, unlike the other Wraithlord. His joints are firm, and he's even fallen a couple times and not shattered (that arm you see was removed on purpose by me, and not without having to use a little strength to get it out). I want to pass on to other Eldar modelers what it is that I did, and I am even going to type this in bold so that you don't forget (if you undertake to make a Wraithlord): Each arm and leg has a small divot which works like a ball joint that goes into the torso sockets to hold the limbs in place. Take a jeweler's saw or, if you don't have that, a dremel or a file, and saw cross-shaped grooves into that divot (or ball or whatever you want to call it). I don't have a picture, but it should look like you could use a phillips screwdriver on it. Then, use super glue and Green Stuff to get it into the socket and let it dry thoroughly. After you do this, the joint will be very, very secure. I wish I'd known this before I made the other... (counting on fingers) four Wraithlords I've made in my lifetime. The first Wraithbone-painted Wraithlord I've shown you probably wouldn't have benefitted much from this technique, as his joints were at such severe angles out of the socket (I used plastic tubing, Green Stuff and pins to get those to stay put), but most Wraithlords, even the ones in really kooky positions, will benefit from this.

I like the Eldar Missile Launcher on the arm. I probably wouldn't do it again, but it was cool to get it nice and tightly glued to the forearm. I have some cool painting ideas for it, so we'll see how that goes. What you probably won't notice, however, is that I transplanted a flamer (pewter, no less) under the arm which normally carries a Shuriken Catapult. I even attached the ribbed tubing and everything. It worked out great.

Bad:
Boring pose. I could have done better.

The brown ink wash (the same one I used on the other Wraithlord) didn't turn out so well. Why? I eventually figured out it's because I didn't add a drop of dish soap. Hard to believe, I know, but the ink behaves SO much differently when it's got a bit of that soap in there. The way it covered the Bleached Bone on Wraithlord number one was smooth and transparent, giving a little texture and character, but not overpowering the paintjob. The soap-less ink was much "harder", deciding to pool and gather and spread unevenly. We're not just talking about surface tension here; this is a question of actual consistency and pigment. Lesson well learned.

Interesting:
I'm working on a replacement for his power assembly (i.e. his backpack). I like it MUCH better than the standard antenna thing that goes on there, but it remains to be seen if I can make it into something special or not.

I also did a really nifty base for this guy, but I'll show you later.

Here's something I think is working out well:


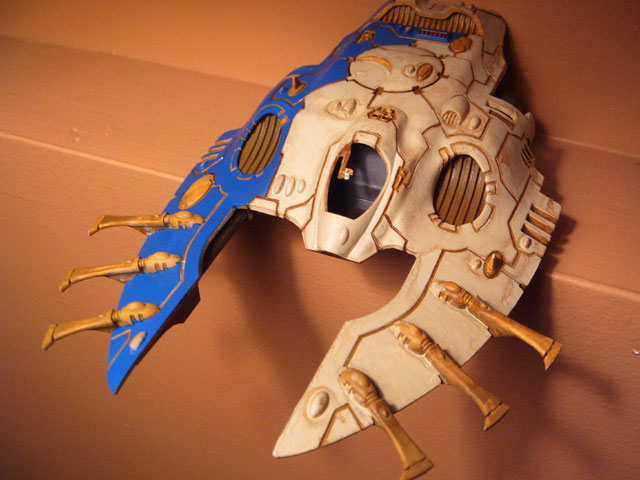
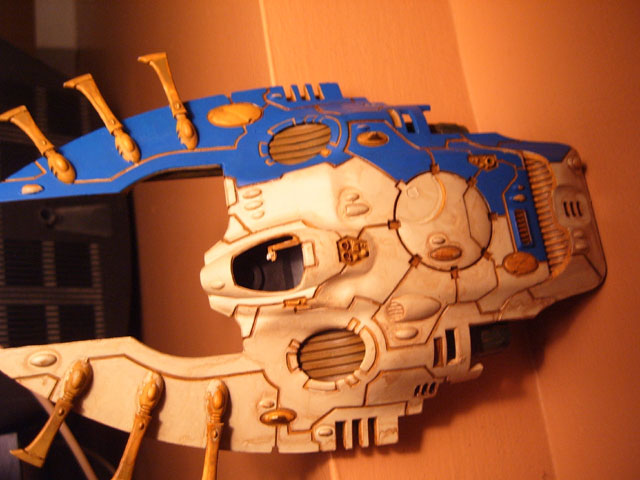
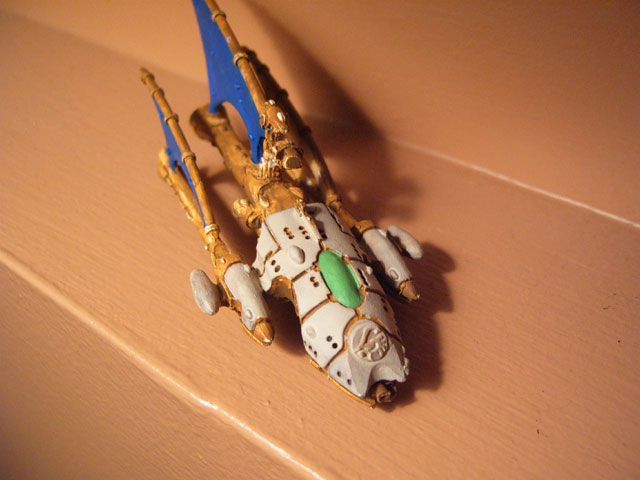
This Wave Serpent has gotten one heck of a lot of tender loving care. I based it with my usual slathering of watered-down Snakebite Leather (which every model pictured in this post got a dose of) and applied the Bleached Bone to the panels in not one, not two, not three, not four, but... five very watered-down coats. I learned my lesson with the Scorpion Mark II Superheavy; take your time with the whites (or bone) because when you get it right, it's so very right. I remembered the dish soap in the ink. I took about a week to paint it up to what you see here.

A bit about that Snakebite Leather base: It's amazing. I didn't used to think of it as such a great color, but I'm a huge believer now. It makes an amazing wash; it becomes very organic and different hues, dark and light, settle into cracks and spread over highlighted areas making a crazed and rich texture over which to apply whatever comes next. I really like it.

I managed to do just a bit more than half of the Wave Serpent in the Bleached Bone and was preparing to do it all in that color when it occurred to me how luscious the blue would look next to the bone. In the second two photos you can really see it. The bright, jewel blue that's even and crisp (though some edging isn't quite finished) to contrast the organic, dappled Wraithbone was just perfect. I also thought it gave the Wave Serpent less of a "military" look and more the look of a work of art, which is how the Eldar see their tanks and skimmers. I will finish it with accents of Snakebite, yellow and, of course, several deep purple gems. I think this might be one of the best-looking things I've done in a very long time.

You'll also see that I've gotten started on some War Walkers...


(Notice that by their hooves I've also put in more Space Marine crap, and that I'm doing the Bleached Bone in layers, like on the Wave Serpent)

A Warlock...
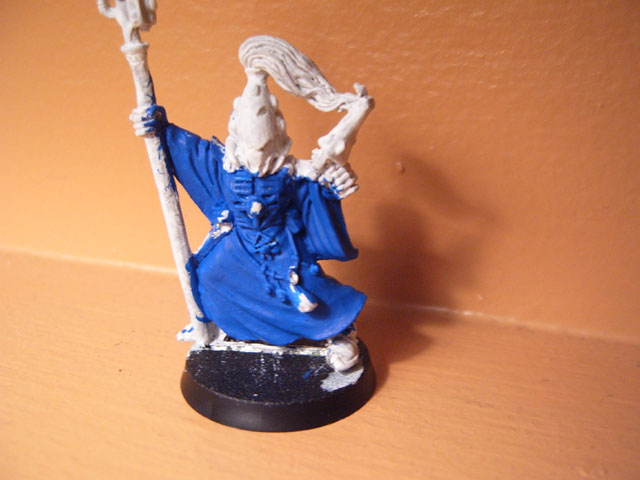

...Wraithguard...

(BTW the glare on the gun isn't from the light; that's my highlighting. I'm very proud of that)

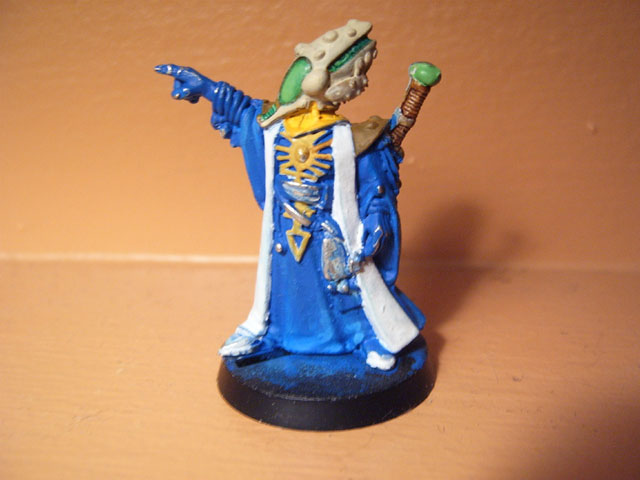
..and, of course, that pesky Farseer I keep talking about.


This is the Farseer, if you recall, that I'm painting up for the end of the month in competition with Bill (who recently told me to "suck this"). All in all, I like the way this guy is developing, but he's not quite there yet. I did some great highlighting on his robes, but ended up rubbing it off by accident while working on the scabbard and the helmet. Once I'm done the helmet I'll go back and redo those highlights. Doing the Wraithbone on the chest is going to be murder, but if I'm careful I think I'll do a decent job. There will be gems as well, and lots of runes by the time I'm done. The only thing that's actually where it will be when I am completely finished is the scabbard on his back, and even that needs a little Wraithbone and some gems.

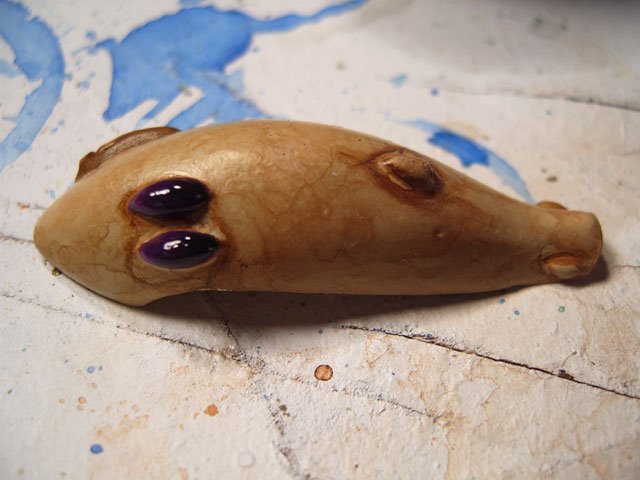
Realizing that I will very, very likely NEVER have a complete 40k force in the Wraithbone/Blue/Yellow scheme I love so much, I've decided that my Epic and Battlefleet Gothic models will all be done in that style so at least I have SOMETHING I can put on the table in a unified Wraithbone theme. Here are some of those models for your perusal:
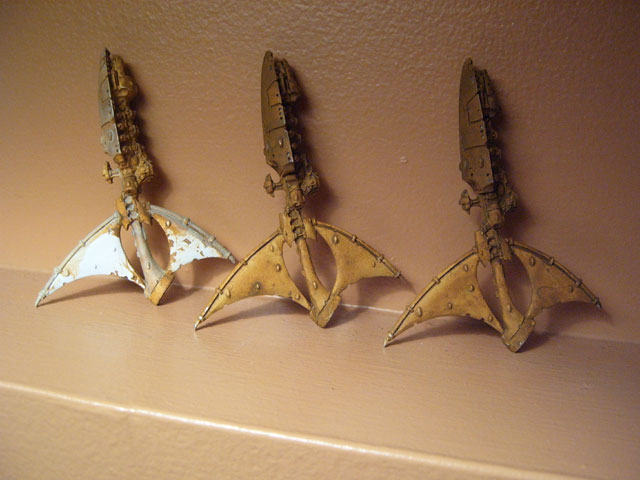


Same thing as the rest of the stuff: Snakebite base, Bleached Bone in many coats, blue here and there, blah blah blah. I really like BFG and I do want to get into playing it. I have a bunch of Epic stuff now, which is also really neat, but I have been mostly gluing, basing and priming (in white), so there's not much to see just at this moment. BTW, yes... I see the green smudge on the Flagship's sail. Thank you.

Unfortunately, you can see that I have started painting things which don't start only with "W"... but I do like where all this is going. I have a tournament to go to this weekend, so I'll be spending Saturday painting the old red, black, white and gold again. This has made for a great break, however, and if I ever get the time I may just dump the entire Deimhinn Sinn roster into a vat of Simple Green and start all over again.

Or I could just rub my head with a cheese grater while I chew tin foil. Either or.

11/24/2005

From Now On I Only Paint Things Which Start With "W"

Wraithlord. Wraithguard. Wave Serpent. Warlock. War Walkers.

I didn't plan it that way, but that's how it worked out.

On the one hand, I don't really want to start a new army. Neither do I intend to. On the other hand, I'm really enjoying the painting I'm doing right now. The new Wraithbone techniques that I'm employing, while simple, are really giving me a look that I savor. The way that the ink and paint create an organic and almost "breathing" feel to the wraithbone just rocks my world. Add a little blue and yellow and it's even more luscious.

I have decided, therefore, that I am going to paint until I don't feel like painting anymore. If I paint five models and lose interest, so be it. If I paint ten and lose interest, that's fine. If I do enough for a kill team, fine. If I finish a combat patrol, that's also fine. If it becomes an actual army (I suppose it'd be Iyanden if it did), then great.... though, seriously? I know what goes into painting and entire army, so don't count on that happening. Still... between the painting of the Farseer for that contest and the Wraithlord I did for interest sake, I have a lot of enthusiasm for this particular direction and, seeing as I haven't had much enthusiasm for a while, that's good news.

11/11/2005

Kids

I let my kids play with my Warhammer models. I explain to them that they need to be careful, but I don't let it worry me too much. As I just said to my buddy, Bill... Life's too short to try explaining to a five year old why Dad's allowed to play with little space toys, but not her. :)

11/10/2005

Mighty, Mighty Wraithlord

The Wraithlord is as you see below... started putting it a bit more "together" with the head and arm and all. You'll also notice some Space Marine-related detritus at his feet (that'll look good, if you ask me). The one thing that's different than yesterday is I put some Green Stuff around the joint in the left arm and created ribbing with a knife.

More painting needs to be done and basing and the whole thing... but he's coming along nicely (as long as all that Green Stuff on the shoulder joints doesn't come loose).

Free Image Hosting at www.ImageShack.us Free Image Hosting at www.ImageShack.us Free Image Hosting at www.ImageShack.us

All The Little Toy Soldiers

I've decided to write up a little rundown of all the stuff I'm currently working on. Ok... well... not "little", per se... but here it is nonetheless. See all those models lined up on my painting station thingie?

Free Image Hosting at www.ImageShack.us

That's what I'm working on. I've just recently begun to realize that, yes, I have a lot of Guardians in my army and that's a good thing... but they're all quite boring and the same. I painted them up very quickly when I got them so that I could get them on the table... all the same. I've decided that I want new Guardians to add to the lot and I want them to look good and unique and interesting. Like a lot of Eldar players, I took notice of the snazzy Wood Elf model line from GW and, like a lot of other Eldar players, I brainstormed how I could somehow add them to my own army. I took a look at the recent White Dwarf Canadian Supplement and saw some (okay, one) interesting idea for merging the Archers with Guardians. I'm going to make the best of that idea and see if I can't add some character to my militia. Here's step one:

Free Image Hosting at www.ImageShack.us Free Image Hosting at www.ImageShack.us

You also might know that I'm working on my Epic army and a while back I acquired a Cobra superheavy. I've been using that Wraithbone technique I keep talking about, and it's half finished... but here's what we've got nonetheless:

Free Image Hosting at www.ImageShack.us Free Image Hosting at www.ImageShack.us

The rest of the Epic army is going to be in my hands in maybe two weeks or so, and while I'm not sure I'm going to just go mental painting it all at once, I am looking very much forward to laying them all out on a table and looking at them and going "Oooooo! Nice!"

More Wraithbone: I picked up a bunch of Wraithguard from a friend who just wasn't using them. I have a strange relationship with Wraithguard in the sense that I like the models a lot, but hate most of the paintjobs people do. I am struggling now to make sure that I do a paintjob I can live with, because when Wraithguard are done nicely they look awesome. Does this one look awesome? I dunno. Once I've done the highlighting and touch-ups and the base, I might be bold enough to call it "competent".

Free Image Hosting at www.ImageShack.us

The other problem I have is that I'm not a huge fan of Wraithguard in the game. The gun they carry has a rather short range, their mobility isn't very impressive and their points value is rather high for what they do. Now that I have a "finished" Eldar army, painting up units like this is something of a luxury but, hey... I like luxury.

A new development in the Games Workshop world has inspired me to reconsider a new project: Their Lord Of The Rings line is no longer "hands-off" when it comes to conversions. You can now mix and match with other games from the GW line with impunity, play those models in the stores and do whatever you wish (so long as it's no displayed in the store window). This is told to me by a GW employee, so I'll assume it's true. Ok, so a while back I got me some of the Elves from the LotR product line because I fell in love with the sword-swinging models with banded armor. I am now picking up my plan again to start trying to turn them into Storm Guardians. Honestly, though? I don't know if this is going to go so well; the scale is way off, they lack the Guardian "look", they lack the Shuriken Pistol modeled (and it wouldn't be easy to add it) and I don't like the way the blue is going on. Nevertheless... here's a pic of a primed elf with a few strokes of Regal Blue:

Free Image Hosting at www.ImageShack.us

Not long ago, I mentioned a competition I've undertaken against Bill, and I did start working on the Farseer in question. I was unhappy with it (particularly the yellow) and tossed him into a pot of Simple Green where he has stayed for the last week. I finally pulled him out (and the paint slipped right off, which was nice), hand-primed him and took this pic:

Free Image Hosting at www.ImageShack.us

You might also remember the Wraithlord I've been working on. I've actually pulled it apart and rebuilt it twice... and that sorta sucks because I simply can't get the left arm (the one with the upturned hand) to attach to the shoulder firmly. I use Green Stuff, but it always seems to dry too rubbery (rubberily?) to hold the weight of the metal properly and, frankly, I can tell that one bump will knock the arm clear off. The other problem I'm having is that even if the Green Stuff does do the job, it looks like a wad of chewed bubblegum crammed into his armpit. Observe:

Free Image Hosting at www.ImageShack.us

Alright, so obviously that doesn't look so good. Instead, I've cut a piece of thin plastic tubing, filled it with Green Stuff, put a pin on both sides of the socket and glued away. It's drying now.

Note, by the way, how I've also washed the Wraithlord body with brown ink and how much better it looks nice compared to the pre-washed version.

Free Image Hosting at www.ImageShack.us

The Wraithlord's face is nearly done, though. He now has gems, Wraithbone, and some script/runes/designs with Regal Blue. I've also done a thing where I made runes with black paint, painted a thinner white line inside, then painted over that with yellow paint. I think I can honestly say that I'm not capable of painting smaller or finer lines than what you see down near the Wraithlord's chin.

The rest of the Wraithlord and the Wraithguard as well will all have various runes and markings on them which are similar to the Wraithlord's face.

Free Image Hosting at www.ImageShack.us Free Image Hosting at www.ImageShack.us

Just for fun (and for the sake of making this post longer than it already is), I'm going to compare this list to the last time I made a list of stuff that needs working on.
The Battle Of Macragge: Marines and their doo-dads (like the cannister thingie); Basing all the infantry nicely; Marine scenery (the Tyranid scenery is done). Not only completed, but sold since then.

Battlefleet Gothic: Four Shadowrunners, one Wraithship and Yriel's Flagship. No further ahead in any way, shape or form.

Dark Eldar: Sold the whole lot.

Eldar: About 40 Fire Dragons. Done! Swooping Hawks that need to be properly mounted and have their paint jobs finished. Uhh... nada. Some Grav Platforms that need work. Also nada. Overall touchup of scratches and chips. Several Heavy Weapons that need finishing (magnets installed and painted properly). Did that. Then there's the Scorpion, which needs a whole lot more paintin'. Well, a little bit here and there. Planning to do a good chunk of it on Friday.

Tau army: Got it, but it's sitting in a box for now.

Man. I haven't done nearly as much as I thought I would. Heh... I suck. :)

11/09/2005

The Effect Of Wraithbone

If you've been following my painting over the last year or so then you'll know that my main Eldar force is black, gold, white and red... even though Eldar are "supposed to be" painted in Wraithbone. Described in the fluff as a "psychoplastic", Wraithbone is what Eldar use to create weaponry, army, tanks and spaceships... and I've gotten a finger waggled at me a number of times over my use of metallics in my armor. Well, my personality is such that I tend to say "eat me" in response. I think the gold looked good, I wasn't in the mood for Wraithbone and it didn't appeal to me.

Now that I have a fair amount of painting behind me I've started to get interested in trying new things. I've hauled out some old models I never touched and started experimenting with various approaches which digressed from the darker colors and the yellow metallics... just for a change. I ended up coming up with some Wraithbone approaches and settled on a Snakebite Leather/Bleached Bone/Brown Ink combination. After adding a few splashes of color with blue, purple, yellow and black, it's started to really appeal to me. You've seen my Epic Falcon a few posts back and you can see what my basic Wraithbone look is.

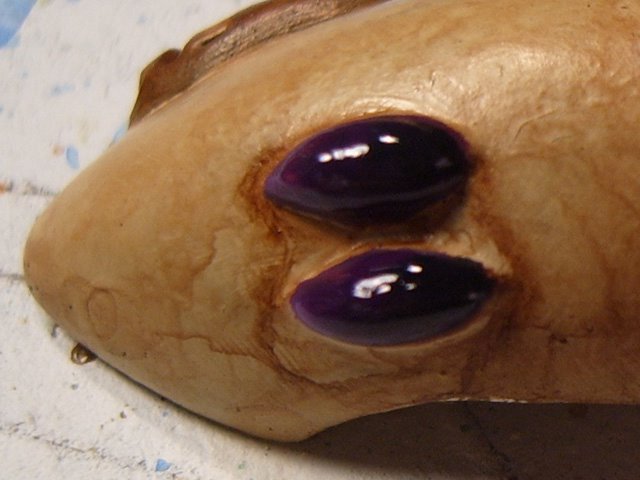
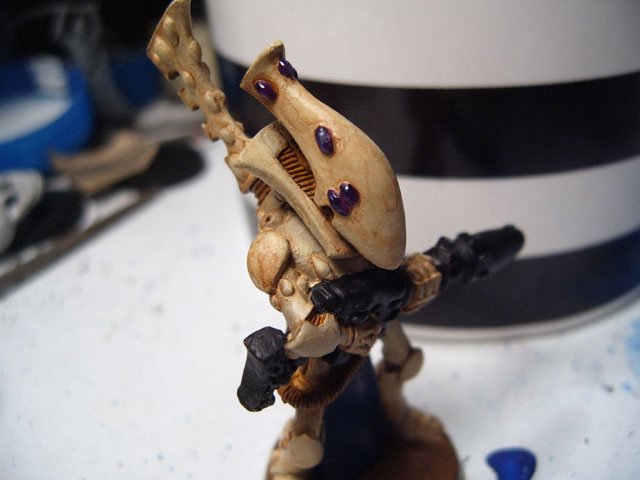
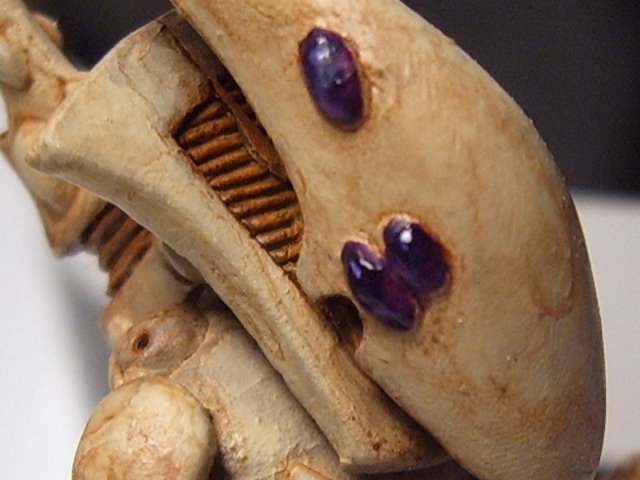
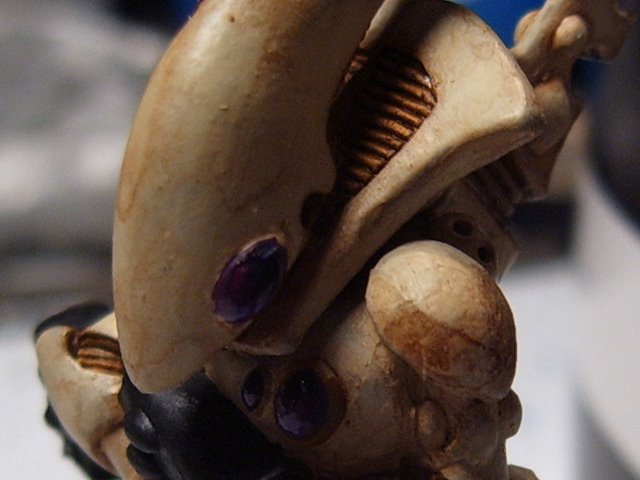
What I'm writing aobut now is how much I love the way that the organic, natural look of the earth colors and inks do the work for you and create masterpieces by just by virtue of being applied. I've gotten some decent effects on these models (below) and did a few closeups to show the effects I really like... where the psychoplastic doesn't just look like another out-of-the-pot color, but it almost looks as though you can see it growing naturally under the hands of Bonesingers.

I love it.


11/06/2005

Busy Little Beaver

Big stuff going on with the painting and so on this weekend. Let's get started with the rundown...

The kids and I got to work on that table we were talking about. I got two pieces of celfort side-by-side, glued sand to it and then hacked out a river with an exacto blade. After some painting and drybrushing, I put the Games Workshop "Water Effects" goo in the river,w hich brings us to Mistake Number One: I put the goo on too thick and it dried a bit cloudy. Ah, well... live and learn. At least the kids didn't mind.

Later, I got some more chunks of foam glued together and used the heated wire cutter to carve out a hill and tunnel for the train. I was pretty careful about how I did this, and it worked out nicely. A coat of sand (then a couple coats of watered-down white glue to seal it), and then more paint & drybrush. It's now time to discuss Mistake Number Two: I added some Woodland Scenics underbrush with a bit of white glue. This stuff looks great but, believe me, it will not stick very easily. Whatever it is that you plan to do to keep the WS underbrush on, do 3X as much. Not that it'll matter; you'll still be picking it off your socks for a week anyhow.

I made some more hills out of styrofoam and let the kids paint them. I gave them the choice of adding the sand for texture (takes longer, looks better) or just painting right onto the foam (done quicker, doesn't look as realistic). Naturally, they wanted to go for the quick and easy solution. Mistake Number Three: If you're going to let a 5 and 8 year old paint foam hills, don't turn your back for more than 30 seconds. I was lucky that they didn't end up glazing themselves like donuts, but they slathered so much paint onto the hills that they were literally glued to the newspaper they were sitting on (thank God there was plastic underneath). I fixed it all up, but was scrubbing green paint out from under my fingernails for quite a while, I can tell you.

And now... some pics:

Free Image Hosting at www.ImageShack.us Free Image Hosting at www.ImageShack.us Free Image Hosting at www.ImageShack.us

Ok, moving on to my own work... I've started playing around with some Defender Guardians, mixing them with those awesome new Wood Elf models I love so much. Last month's White Dwarf had some conversion tips for people who wanted to try that (especially Alaitoc players, which reminds me of another subject I'll rant about at length later). I tried a Wood Elf/Guardina conversion about two weeks ago and it looked so positively retarded that I couldn't touch them again for those two weeks. It was that bad. The conversions I'm doing now are modest, but looking good. There will be pics sooner or later.

What I really want to do at this point is more modeling and painting which shows originality and "freshness". That is to say, different from my first batch of 48 Guardians, which all look identical. I want Guardians with personality now; different poses, different faces, different clothes, etc. etc. I know the models well enough now to play around and, thanks to a valuable lesson I learned from my buddy Keith, I'm quite relaxed about throwing in bitz from other models without second-guessing myself. Also, because I have all the basic Deimhinn-Sinn Guardians I need, I'm experimenting with other painting schemes and colors to see what I like without feeling the rush of getting the Guardians on the table as part of a whole army.

So... keep an eye out for some (hopefully) cool-looking Guardians soon.

What's that? You want to know what's next for the kids' table? Stay tuned...

11/01/2005

Just to clarify...

I'm putting the Farseer back in the dunk because I screwed up a few things. I screwed up the black lining on his eyes; it looks uneven and, when you see the two eyes at the same time (like when you look at him from the front), they look like he's looking in two different directions. I have also screwed up the yellow sash considerably. The yellow just plain sucks. The camera doesn't make it look too bad, but the truth is that the surface of it is rough and uneven and the undercoat shows through in a bad way. I could do a lot better with it, so I'm starting again.

Of course... I will post pics here.

Take Two

I'm dunking the Farseer in Simple Green and starting again from scratch.